How To Take a Screenshot On iPad Air 2

No matter what the cause, all releases of the iPad can take a screenshot and easily share it with someone in a few easy steps.
We will use the iPad Air 2 to make the guide for taking a screenshot. However, you can use this guide for other iPad devices including iPad Pro Retina, iPad Air 2, iPad mini 4,…
- See more: How to take a screenshot on iPhone
Following these simple steps, you will be able to take a screenshot of your iPad Air in no time at all.
How to take a screenshot on iPad Air?
1. Using the Buttons
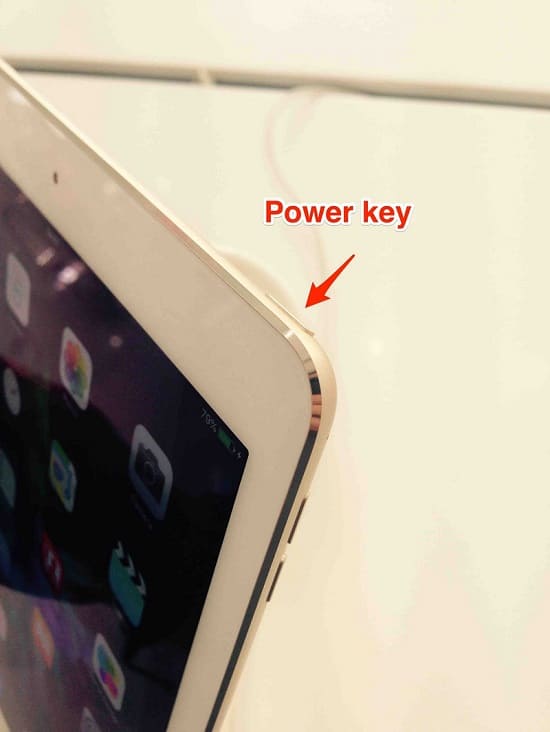
Holding the Sleep|Wake|Power key (at the top-right of the iPad) and the Home key (the circle below the screen) simultaneously until the screen flashes and hears a clicked tone (if your device isn’t on mute).
Sleep|Wake|Power key
Home key

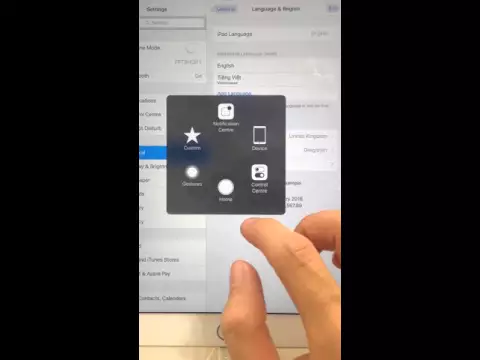
2. Using Assistive Touch
Taking a screenshot by using Assistive Touch can easily be done.
See the video below to learn quickly.
The screenshot will appear in your Photos app >> Screenshots folder and the image will be taken roughly 4MB in size.
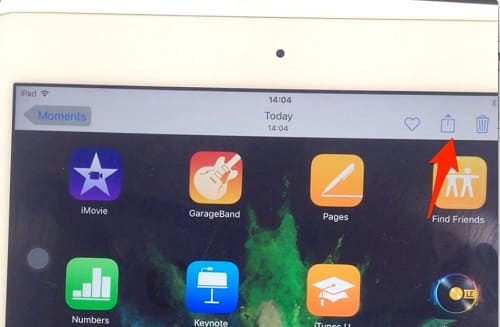
To share the screenshot with someone or media social, tap on the image from the Screenshot folder and select the Share icon at the top-right.
Now you can share to your social networks like Facebook, Twitter, and Flickr or share the screenshot by using AirDrop or the Email app.
In conclusion
Taking a screenshot on iPad Air is easy and can be done in a few simple steps. First, open the app or screen that you want to take a screenshot of.
Next, press and hold the Sleep/Wake button and the Home button at the same time. Once you hear the camera shutter sound, release the buttons and your screenshot will be saved.
Read more: How to Take a Screenshot on an iPod