How to Take a Full Webpage Screenshots (Chrome and Firefox)

When you are working with Google Chrome or Mozilla Firefox browser, there are some times you will need to take screenshots of a web page without needing to use a third-party program. Screen captures can be greatly helpful for education and learning, making a guide for a blog, slideshows, and so on. When taking a screenshot of Web pages, your screenshots are commonly limited to what is watchable on the screen.
In this article, we will show you how to take a full webpage, capture an area of the screen, and then you can save a screenshot of any web page as a PNG, JPG, or GIF format to your PC, Laptop.
How to Take a full Webpage of Chrome and Firefox.
Using Google Chrome Extension
Step 1: Open Chrome browser and go to Chrome Web Store. Then type “Nimbus Screenshot” in the search box of Chrome Web Store.
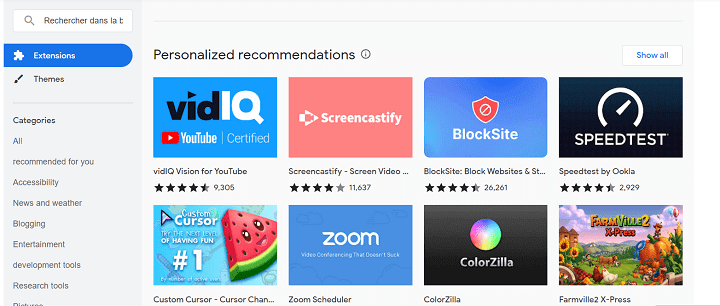
Step 2: Click on the “Capture Webpage Screenshot Entirely” extension and install it.
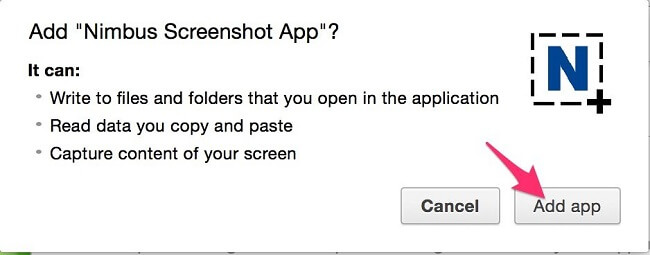
Step 3: When you installed it completely.
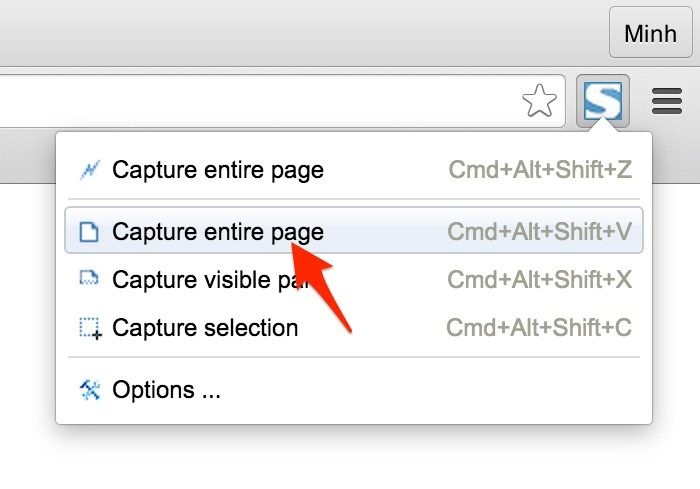
To take a screenshot of a full webpage, click the Screen Capture icon on the Google Chrome toolbar and choose the Capture Entire Page or press the combination: Cmd+Alt+Shift+V on Mac.
Using Mozilla Firefox Add-On
Step 1: Open the Mozilla Firefox browser and go to Add-on for Firefox. Then type “Screen Capture” in the search box.
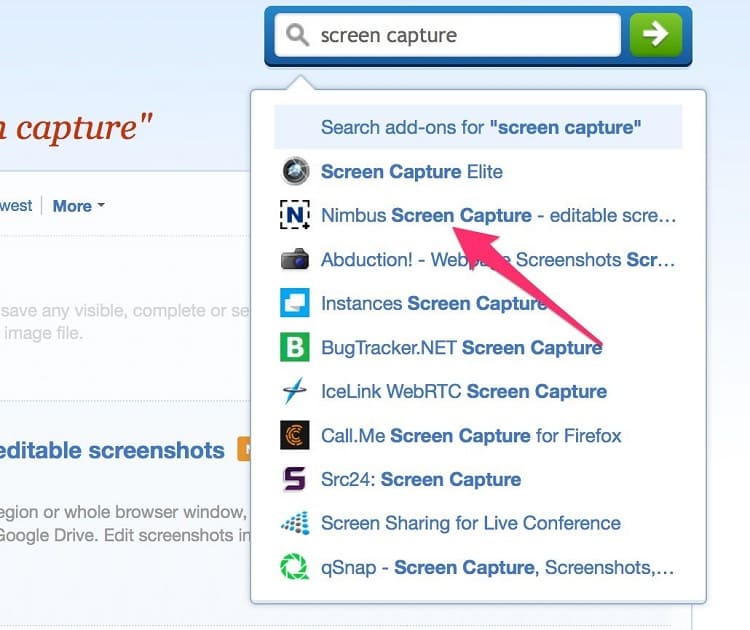
Step 2: Click on the “Nimbus Screen Capture” add-on and install it.
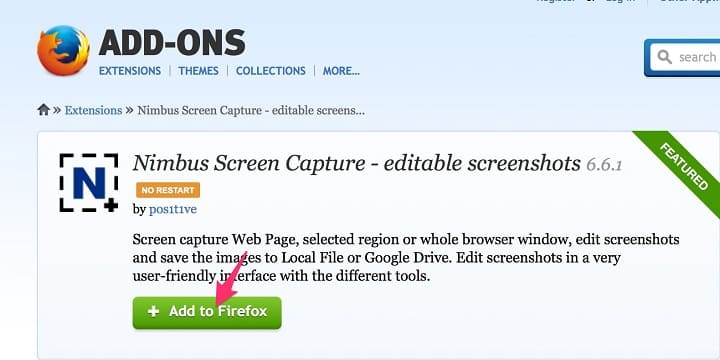
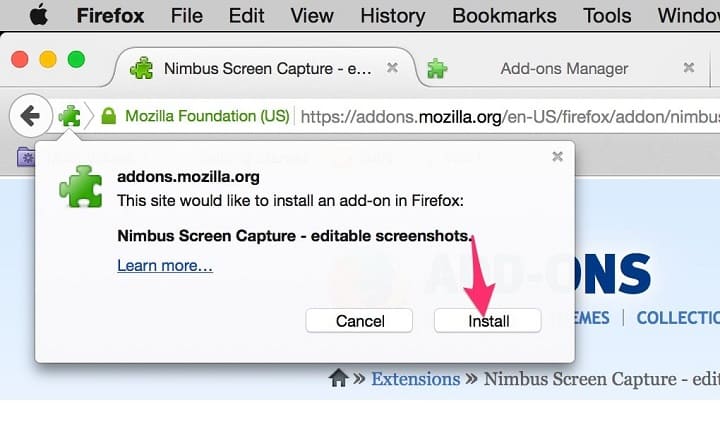
Then, click on Install to add this Add-On to Firefox browser.
Step 3: When you installed it completely. To take a screenshot of an entire webpage, select the Screen Capture (N) icon on the Firefox toolbar and click Entire Page. And you can choose some other options including Selected Area, Blank Screen, and Visible part of Page.
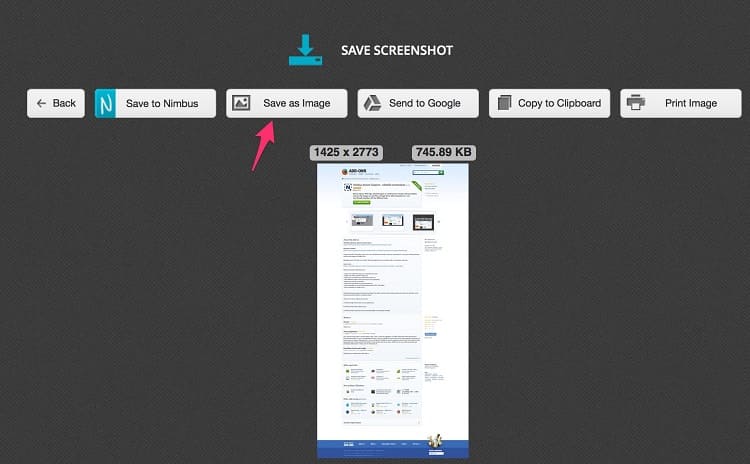
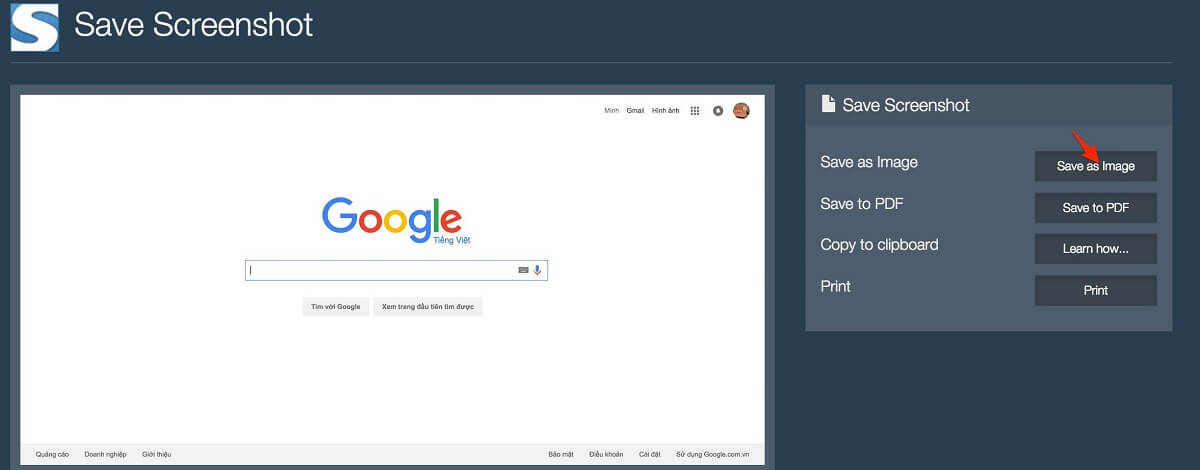
Now, the screenshot of a whole web page will show above the WebPage where you can share and save it to your PC, Laptop.